
This guide walks you through how to create a job in Ciphr iRecruit.
🎥Academy video availableIf you prefer a video walkthrough check out Ciphr Academy. ⚠ Important: To ensure access via SSO please log in to the Academy via your HR system first. Once logged in, you can access the video here: Video tutorial |
Contents
- To create a Job
- Step one - Details
- Step two - Description
- Step three - Job Questions
- Step four - Competency Questions
- Step five - Applicant Offer Fields
- Step six - Additional Details
To create a job
- Click on My Jobs > Add a Job
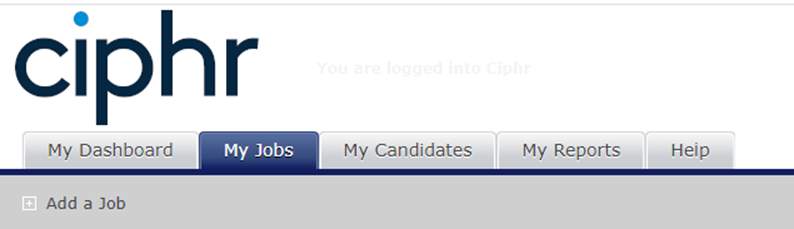
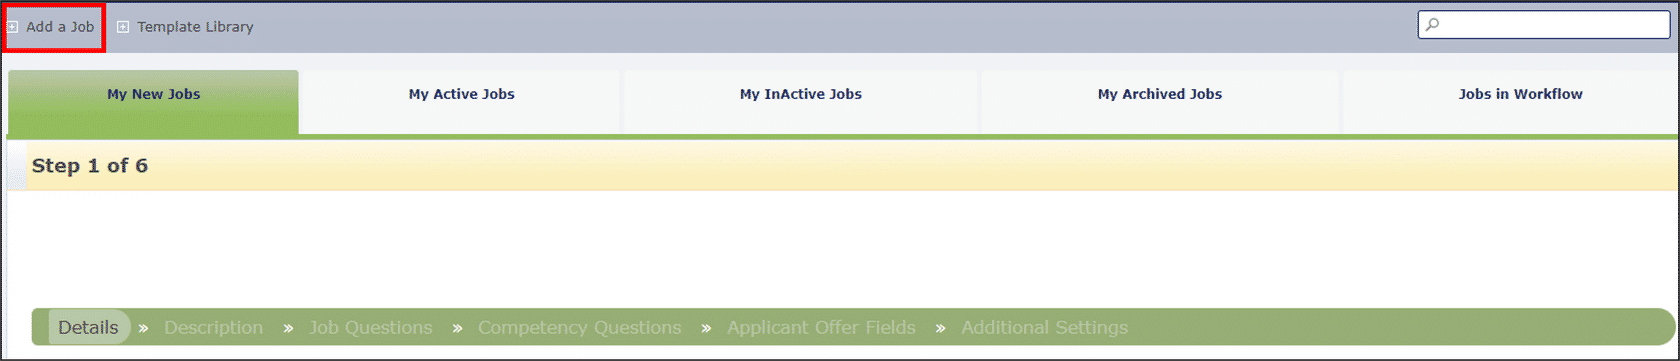
Step one - Details
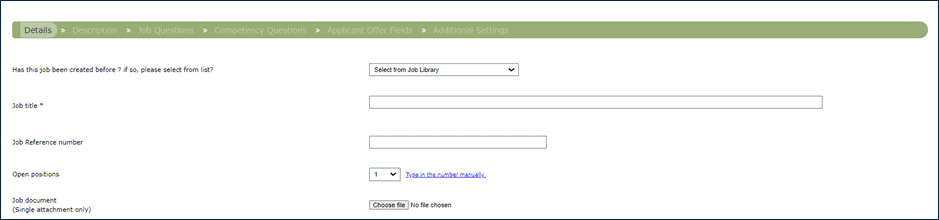
- If the job already saved as a template to the ‘Job Library’ , then select the job title from the picklist to populate the fields
- Enter ‘Job Title’ (This is the job title that will be displayed on the job advert when published)
- Enter ‘Job Reference Number’ (This maybe automated if auto numbering is applied to your configuration)
- Choose the number of open positions for the role
- Upload a ‘Job Document’ (This can be in .doc .docx or .pdf format and will be available to the applicant to download from the job advert)
Enter ‘Geographical Location’ (This is the location field available to see in the recruiters portal)
- Enter ‘Job Region’ from the picklist
- Choose a ‘Job Category’
- Choose one, or more ‘Subcategories’ (Ctrl and Click to select multiple)
| Note: The combination of Job Region, Job Category and Subcategories are used to send Job Alert emails to potential candidates who have chosen their criteria of interest from these three fields when registering in the candidate portal |
- Select ‘Job Title / Contract Type’ from the picklist
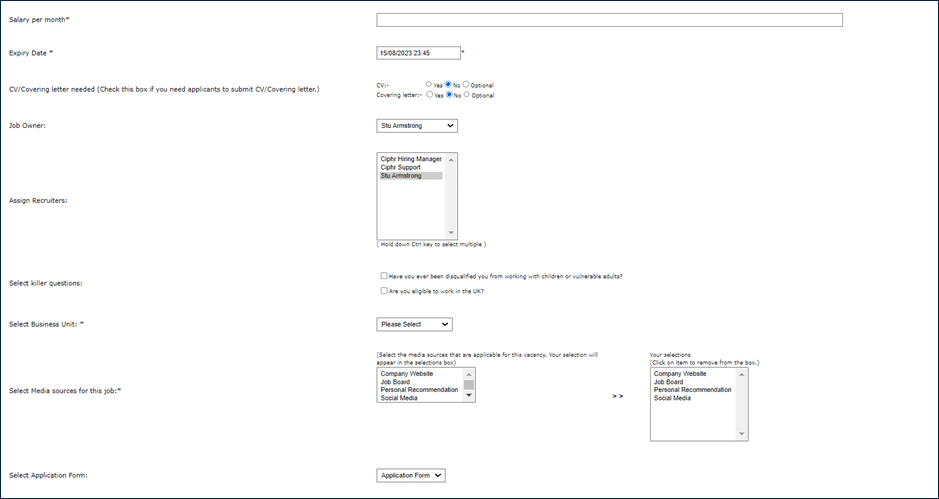
- Add ‘Salary’
- ‘Expiry Date’ This is the date and time that the job will expire and remove itself from the candidate portal and RSS feed
- ‘CV / Cover Letter Needed’ allows you to choose if a CV, and Cover Letter should be mandatory, optional or not allowed to be uploaded on the application form for this role
- Select the ‘Job Owner’ (The Job Owner is the responsible recruiter who will receive any system generated recruiter emails. This will automatically populate with the name of the recruiter who is entering the vacancy, but this can be changed)
- ‘Assign Recruiters’ that should be able to see this vacancy and its candidates in the Recruiters Portal (Note: Superusers can automatically see all jobs and candidates)
- Select which ‘Killer Questions’ you wish to ask in the ‘Eligibility Check’ section of the application form
- Select the appropriate ‘Business Unit’ (If Job Approval Workflow is configured the business unit controls the approval workflow)
- Select which ‘Application Form’ you wish to use
|
Notes:
|
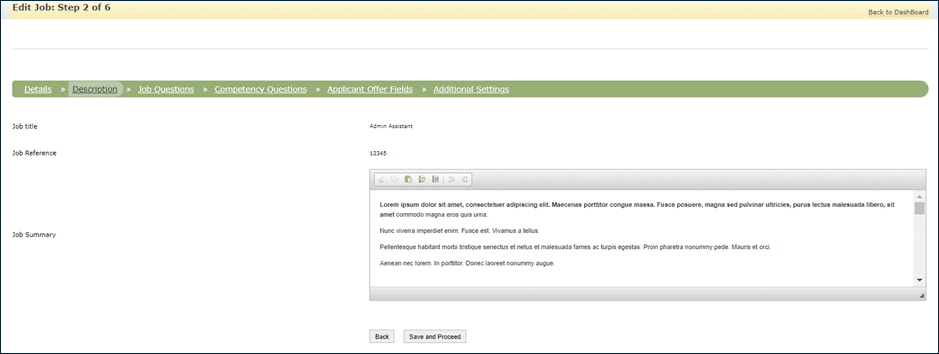
Step two - Description
- Complete the ‘Job Summary’ which will form the main body of text on your job advertisement
Step three - Job Questions
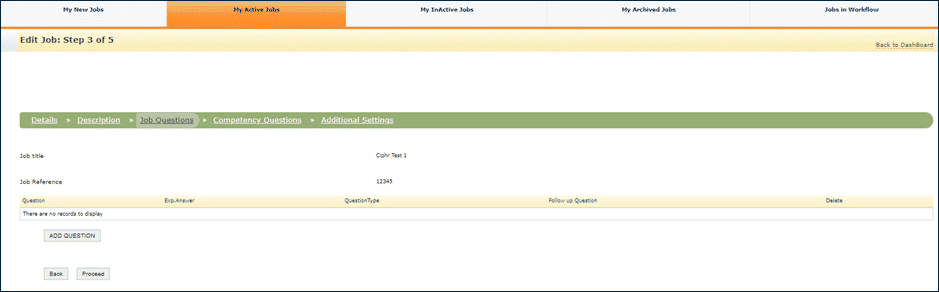
Job Questions are Yes / No questions with a follow-up question based on the Yes or No answer
- Click ‘Add Question’
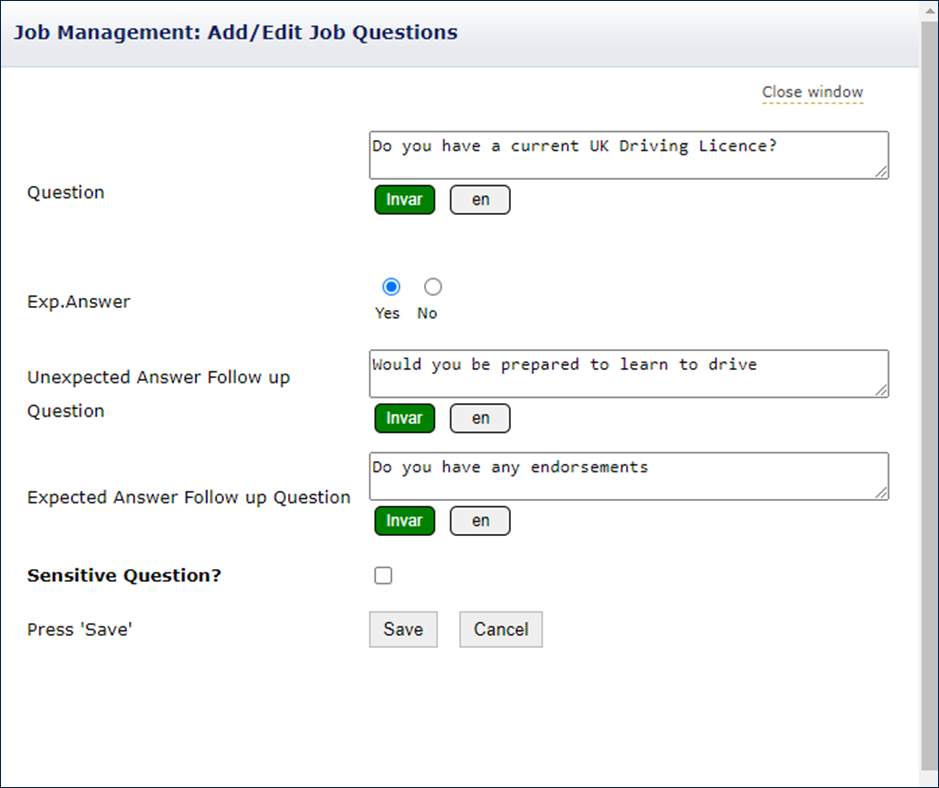
- Question – Enter the question you wish to ask:
| Exp.Answer | Choose the expected Answer |
|---|---|
| Unexpected Answer Follow up question | Enter a follow-up question that will be asked when the applicant answers with the ‘Unexpected Answer’ |
| Expected Answer Follow up question | Enter a follow-up question that will be asked when the applicant answers with the ‘Expected Answer’ |
| Sensitive Question? | If the answer to the question is classed as sensitive / confidential information to be available on to a superuser tick this box |
- Once finished click Proceed
Step four - Competency Questions
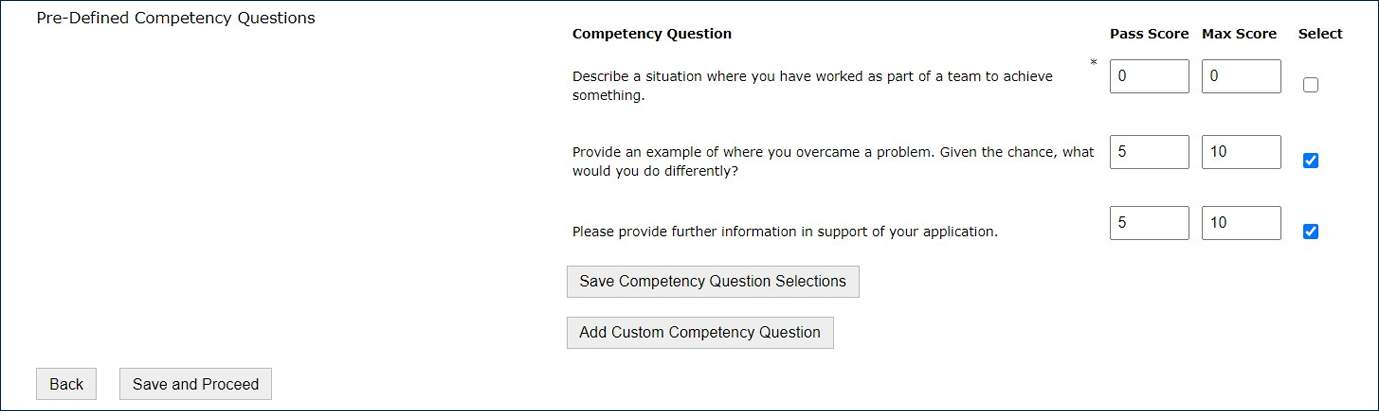
- Select which ‘Pre-Defined Competency Questions’ should be used
- If you require a Recruiter to be able to score against the answers given to the Competency Questions, then add a Pass and Max Score. (For an example, a question may have a maximum score of 10 and anything that is scored as 6 or above would be considered a pass score)
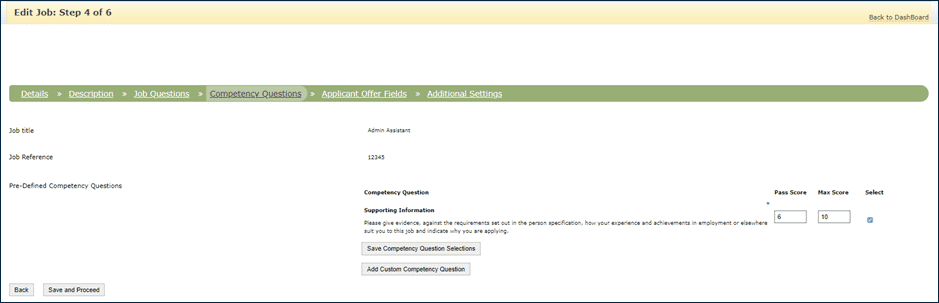
| Note: There may be some pre-defined competency questions which are automatically presented. These can be selected or deselected for inclusion as required. For more details on Competency Questions see the linked guide. |
- Save Competency Question Selections against the job that is being created will save the changes that have been made in this section
- Click Save and Proceed when all competency questions are complete and this will enable you to move on to the next step of creating a new job
Step five - Applicant Offer Fields
The Applicant Offer Fields section allows you to select the fields that will appear in the Offer Form
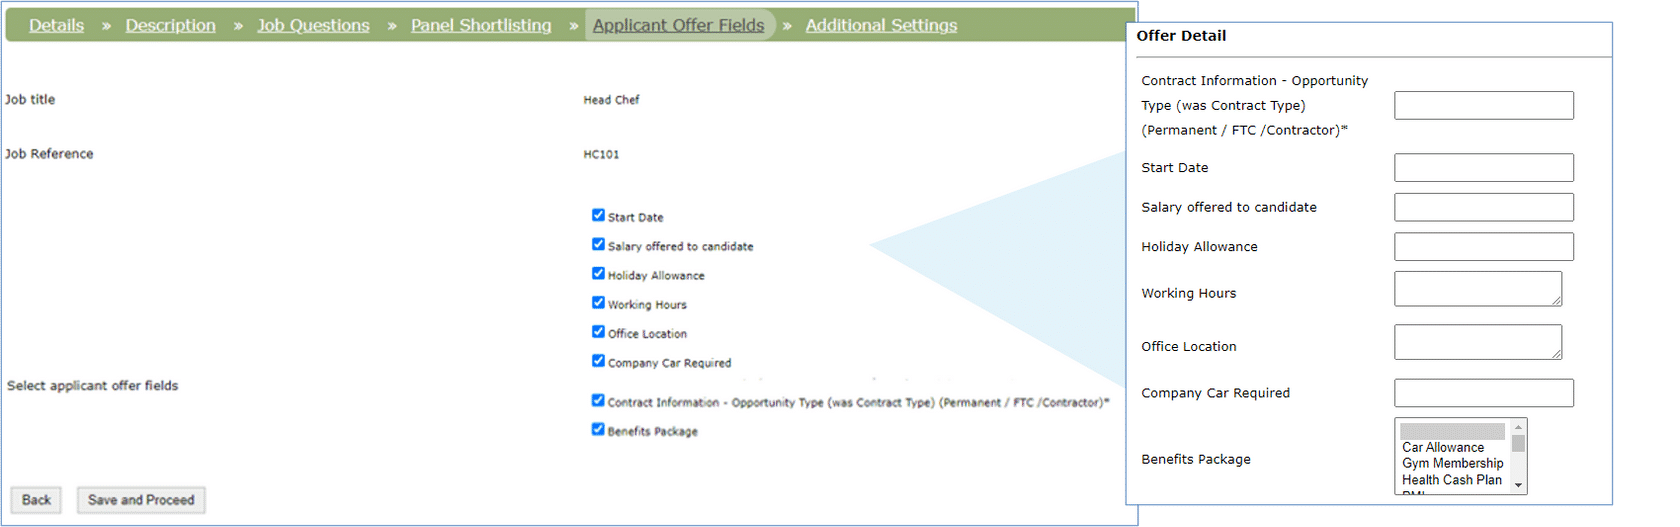
- Check boxes can be edited after the job is published but will become greyed out (read only) once an offer has been made to an applicant, where the associated field(s) were populated in the Offer Form
| Note: This page is appliable only to customers who use an ‘Offer Approval’ workflow, if you do not use this then please go to ‘Save & Proceed’ |
- Click Save and Proceed once you have ticked the relevant offer fields to continue.
Step six - Additional Details
- Click ‘Save New Template’ if you would like to save this job to the Job Library
- Click ‘Publish this Job’ (Hiring Manager users will see ‘Submit Job For Approval’ instead of Publish this Job
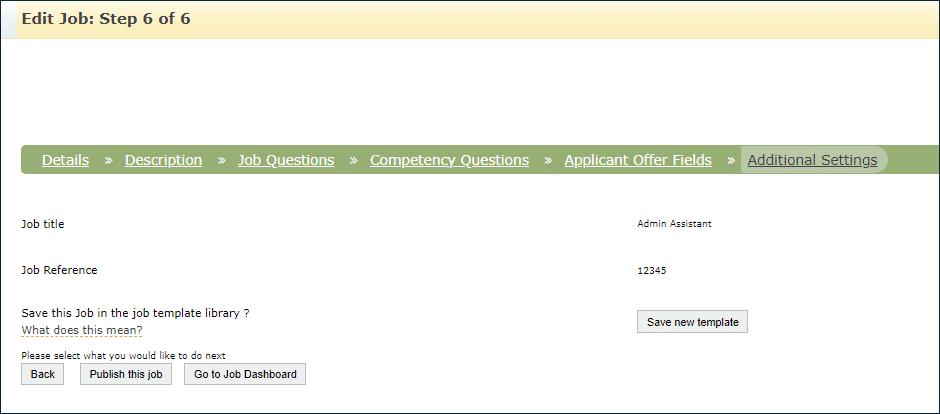
Note: If you use a Job Approval Workflow click Change Job Status to submit for approval. |
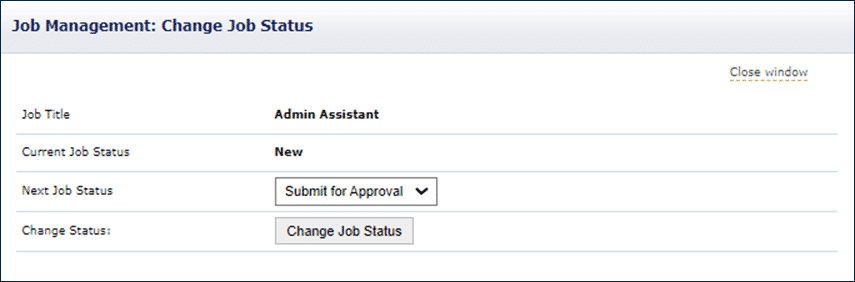
- Once the job has been fully approved the Job Owner will receive and email. They can then go ahead and publish the job
- Go to Jobs in Workflow
- Open the Job
- From the Job Options menu click Update Job Status and publish the job
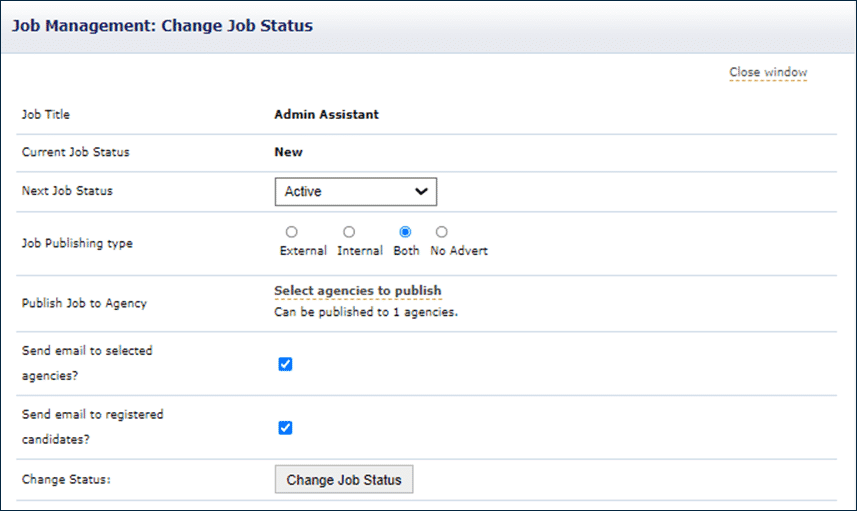
If not using a Job Approval Workflow
- Select ‘Job Publishing Type’
- External – The vacancy will be published on the External Candidate Portal Only
- Internal - The vacancy will be published on the Internal Candidate Portal Only
- Both - The vacancy will be published on both Internal and External Candidate Portals
- No Advert – The job will appear in ‘My Active Jobs’ in the Recruiters Portal only
- If you use the ‘Agencies Portal’ and would like to push the vacancy to a Recruitment Agency, click ‘Select Agencies to Publish’
- Select which agencies to publish to from your preferred agency list
- Select ‘Send Email to selected Agencies’
- If you wish to send ‘Job Alert Emails’ select ‘Send Email to registered Candidates’
- Click ‘Change Status’
The following screen will show you many potential candidates the job alert email will send to
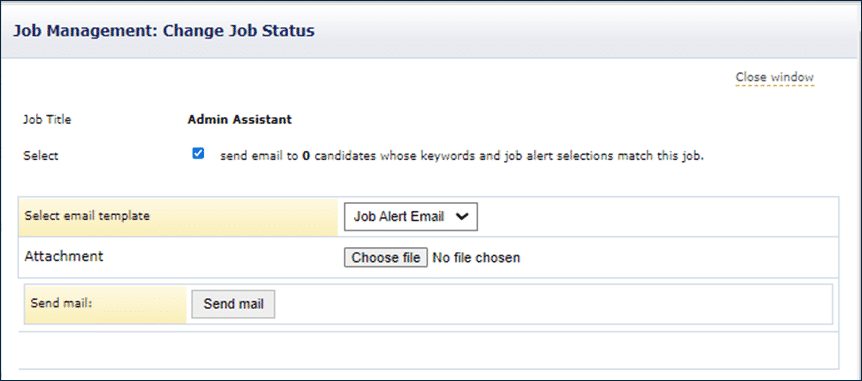
- Click ‘Send Mail’
This job will now sit under ‘My Active Jobs’ in the recruiters portal and will be published as selected able to the candidate portals.
Footer
Comments
0 comments
Article is closed for comments.