
This guide will show you how to access the Workflows area and perform the following tasks:
Contents
- Workflows
- Disable a Business Unit
- Viewing a Business Unit Workflows
- Adding an Approver to a Business Unit Workflow
- Add a new Business Unit
Workflows (Business Units)
| Note: This section of the guidance is only relevant for customers who use Job Approval or Offer Approval Workflows |
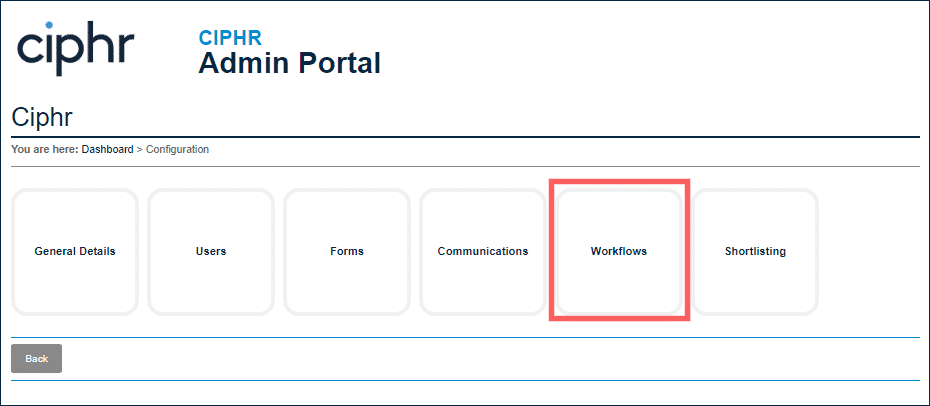
To access Workflows:
- Go to the Admin Portal configuration screen
- Click on the Workflows tile
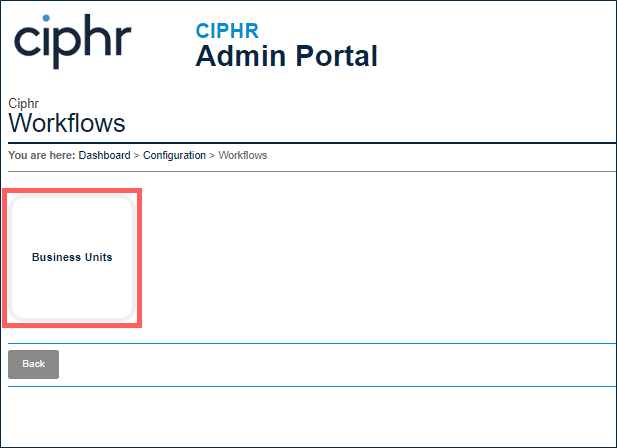
- Click on Business Units
Disabling a Business Unit
To disable a Business Unit:
- Go to the Admin Portal configuration screen
- Click on the Workflows tile
- Select Business Units
- From the list of configured Business Units, tick the Disable Business Unit alongside the correct entry

| Note: When a Business Unit has been disabled it will no longer be available for selection when creating a new vacancy, however any history associated with this business unit will still be available to view |
Viewing a Business Unit Workflow
To view a Business Unit Workflow:
- Go to the Admin Portal configuration screen
- Click on the Workflows tile
- Select Business Units
- From the list of configured Business Units, click on View Workflow alongside the correct entry

You will see who the job approvers are under Approval Workflow.
You will see the offer approvers under Offer Approval Workflow.
- To remove an Approver from a level, click Delete
| Note: You are only able to see the steps that you have access to. If they would like to add any steps then please contact Customer Care |
Adding an Approver to a Business Unit Workflow
To an approver to an approval level against a Business Unit:
- Click on the Users tile from the Admin Portal configuration screen
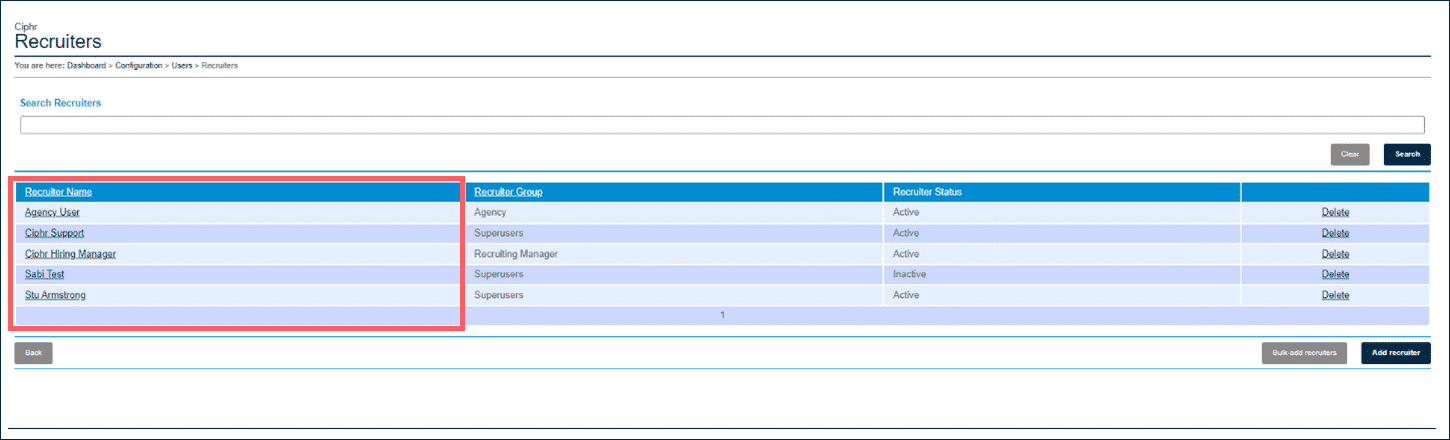
- Select Recruiters
- Click onto the Recruiter Name that you wish to make an approver
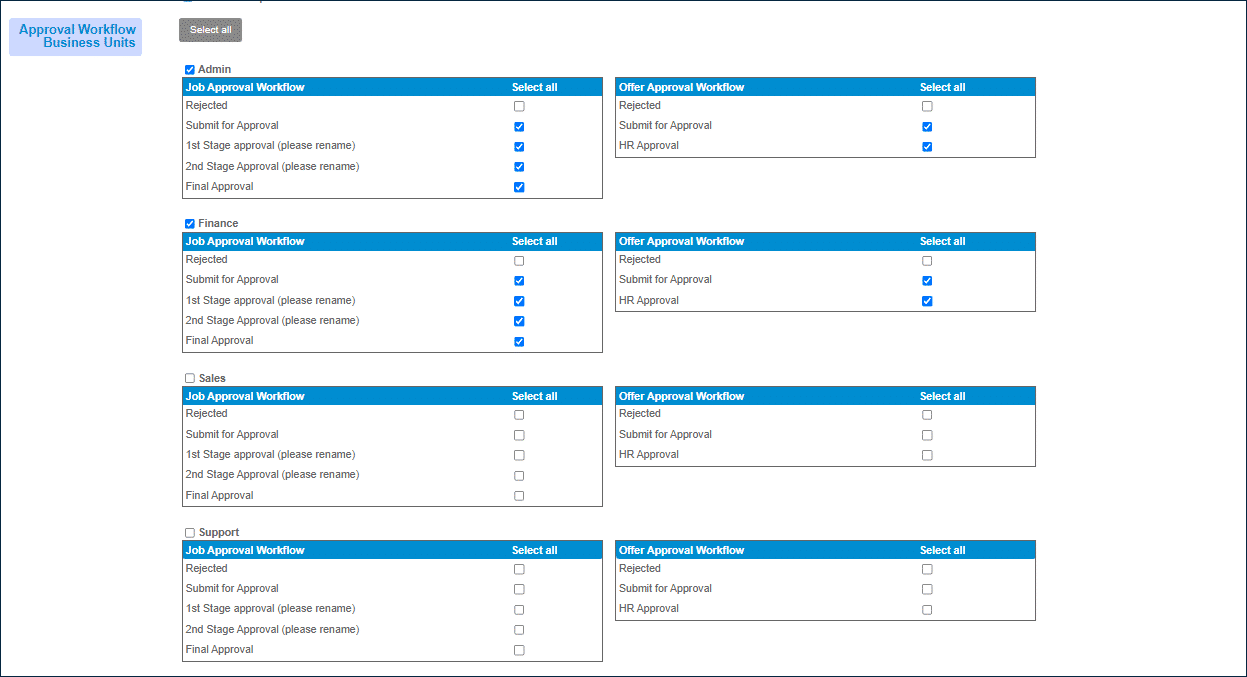
- Scroll down until you reach the Approval Workflow Business Unit section
- Tick the checkbox of the level(s) that the approver should be able to approve against, and for Job Approval Workflow also tick the checkbox above with the name of the Business Unit
- Repeat if required for additional Business Units
- Click Save
| Note: You are only able to see the steps that you have access to. If they would like to add any steps then please contact Customer Care |
Add a new Business Unit
To add a new Business Unit:
- Go to the Admin Portal configuration screen
- Click on the Workflows tile
- Select Business Units
- Click on the Add workflow button

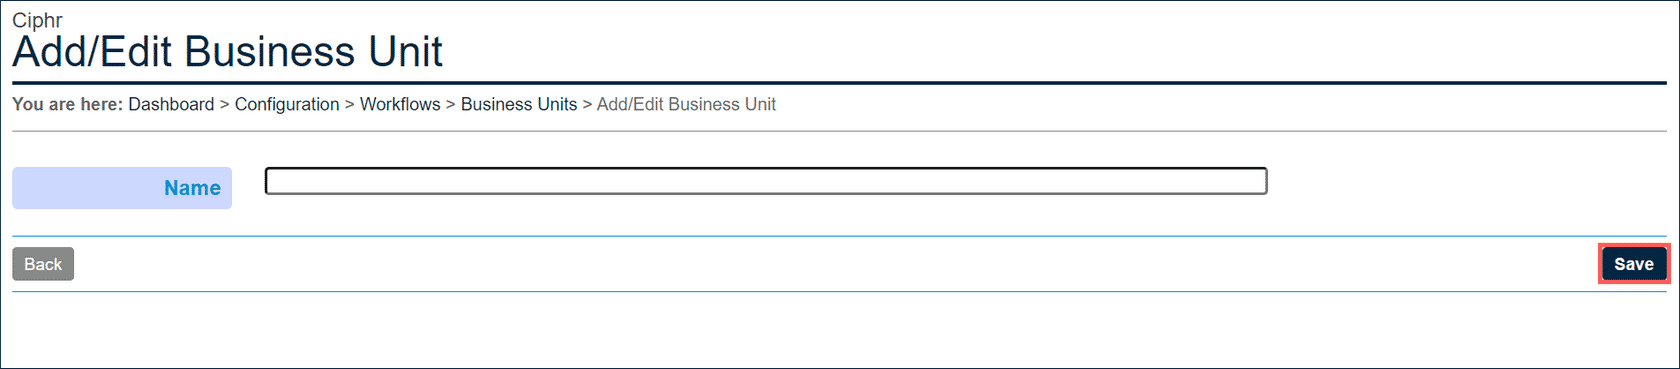
- Enter the desired name of the Business Unit
- Click Save
Footer
Comments
0 comments
Article is closed for comments.