
This guide will show you how to create an interview centre, interview slots and delete an interview centre.
Contents
Introduction
An Interview Centre can be created against a job, so that candidates can log into the careers portal to select a slot that is best suited to them. Recruiters can view a list of all booked candidates against each job.
To create an Interview Centre
- Click on the job title of the role that you want to create the Interview Centre for
- From the Job Options menu click Interview Centres, a pop-up box will appear, click Add new to start to create the centre
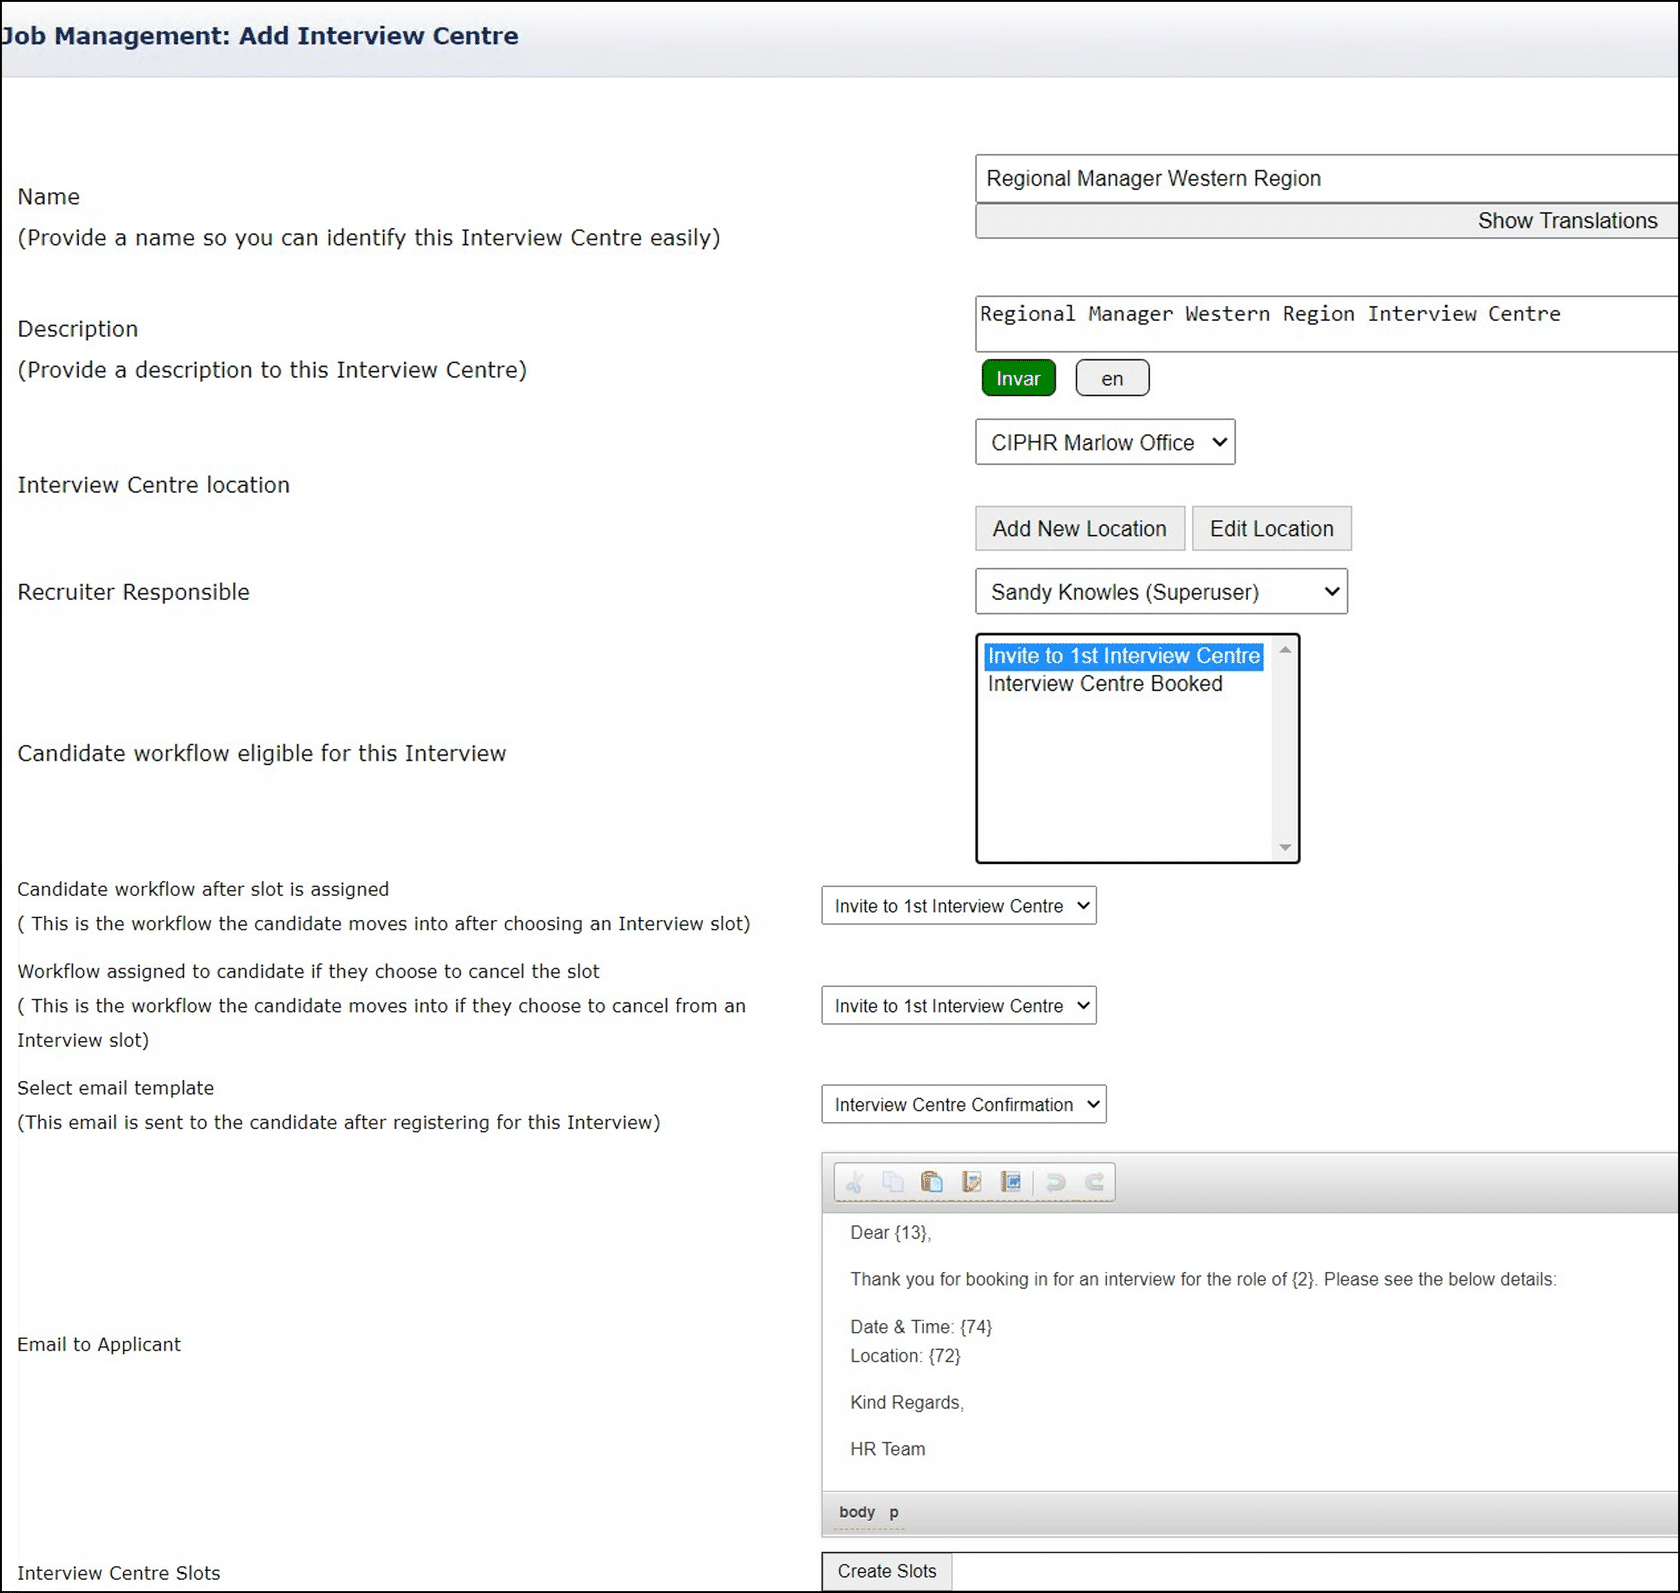
- Enter a Name and Description for the Interview Centre, as candidates will need to able to easily identify the correct centre to select an interview timeslot
- Select from the dropdown list the Interview Centre Location. These are set up in the Admin Portal. Alternatively, a new venue can be added using Add New Location or the selected venue can be edited using Edit Location
- Choose the name of the Recruiter Responsible for managing the event. Recruiters are selected against the job when the role is created
- Select the recruitment stage a candidate must have reached to be eligible for the interview. You can select multiple stages by pressing CTRL and click on each required stage
- Choose the recruitment stage a candidate will be set to when they have selected a timeslot and also the stage the candidate will be set to if they cancel the timeslot
- From the Select Email template dropdown, choose the standard email a candidate will receive when they have confirmed their timeslot
| Note: Email templates and recruiter permissions are configured in the Admin Portal. See the related help guides for more details. |
To create the Interview Slots
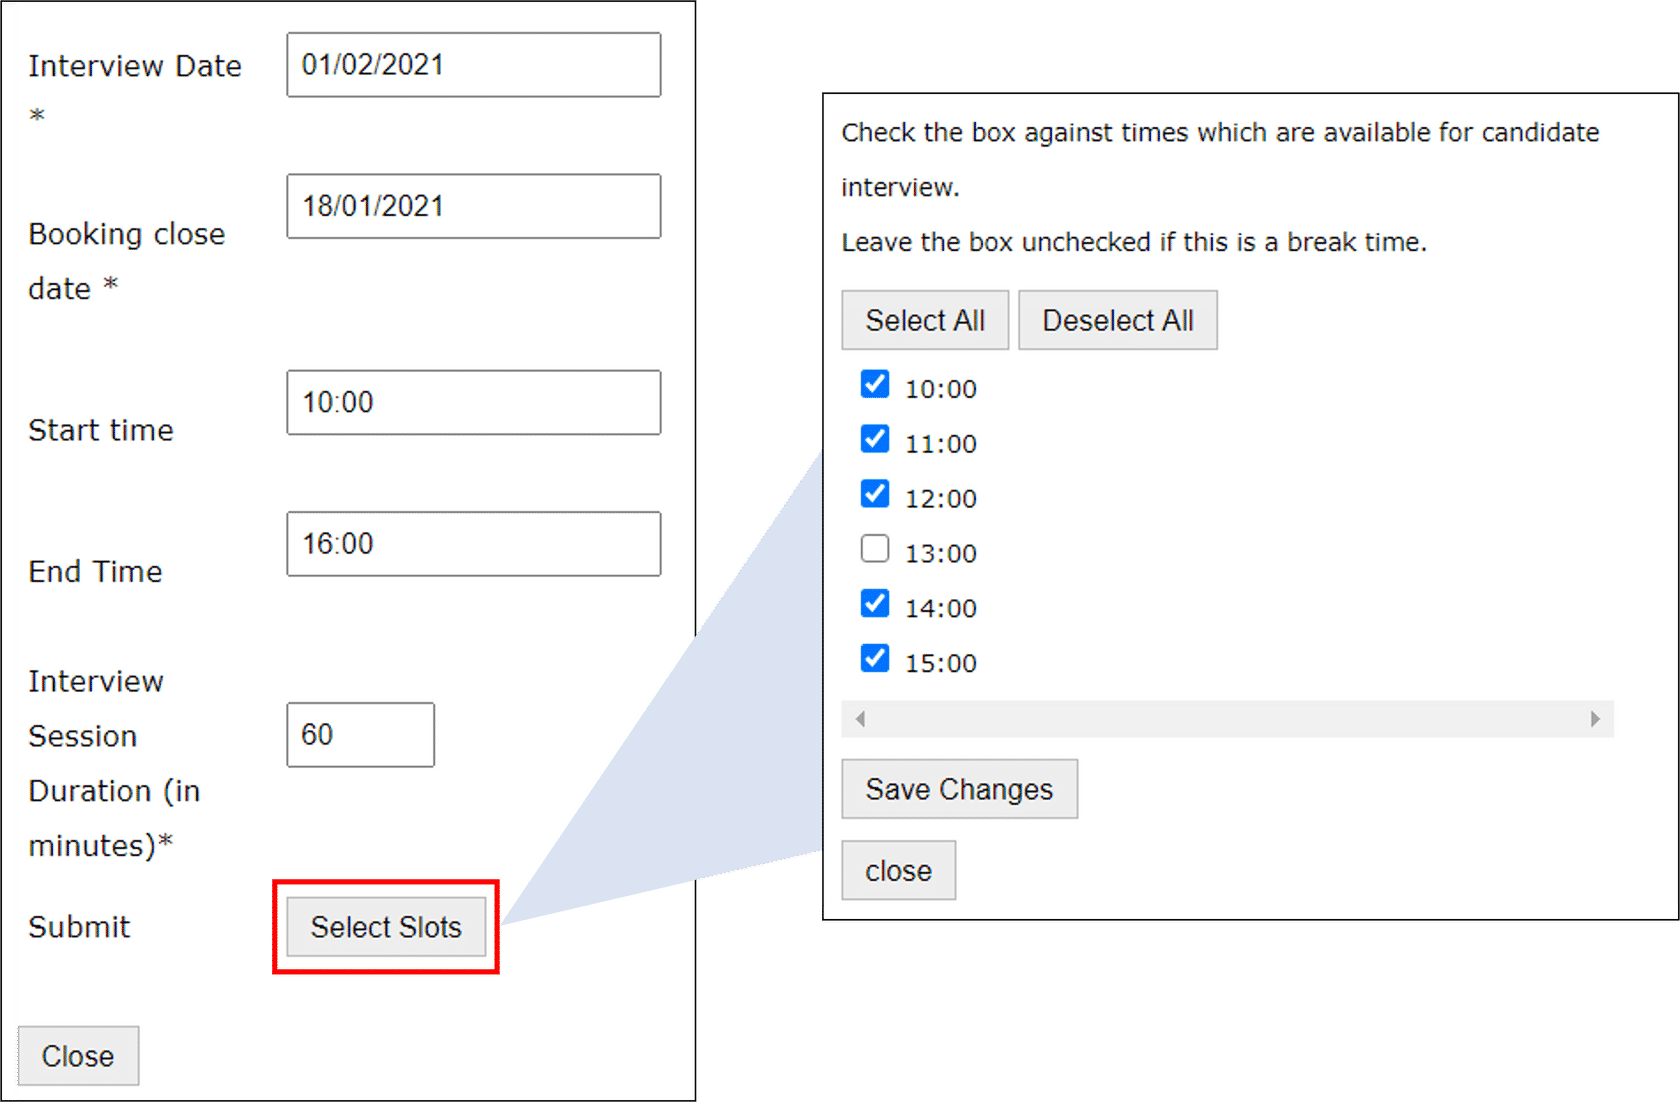
- Click Create Slots. A pop-up box is displayed to enable you to input the Interview Date, Booking Close Date, the Start time and End time for the interview centre and the Interview Session in minutes
- On reaching the Booking Close Date candidates will be unable to select or change an existing interview slot
- Click Select Slots - a new pop-up will be displayed with available times. Check all those which can be selected by the candidate – leaving blank those times which may not: ie lunch break.
- Click Save Changes
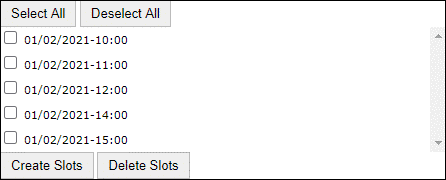
- These slots are then populated into the Interview Centre. Further changes can be made as required
- A document can be attached to the interview centre: eg a map
- Click Save
To delete an Interview Centre
- Click on the job title of the role that you want to delete the Interview Centre for
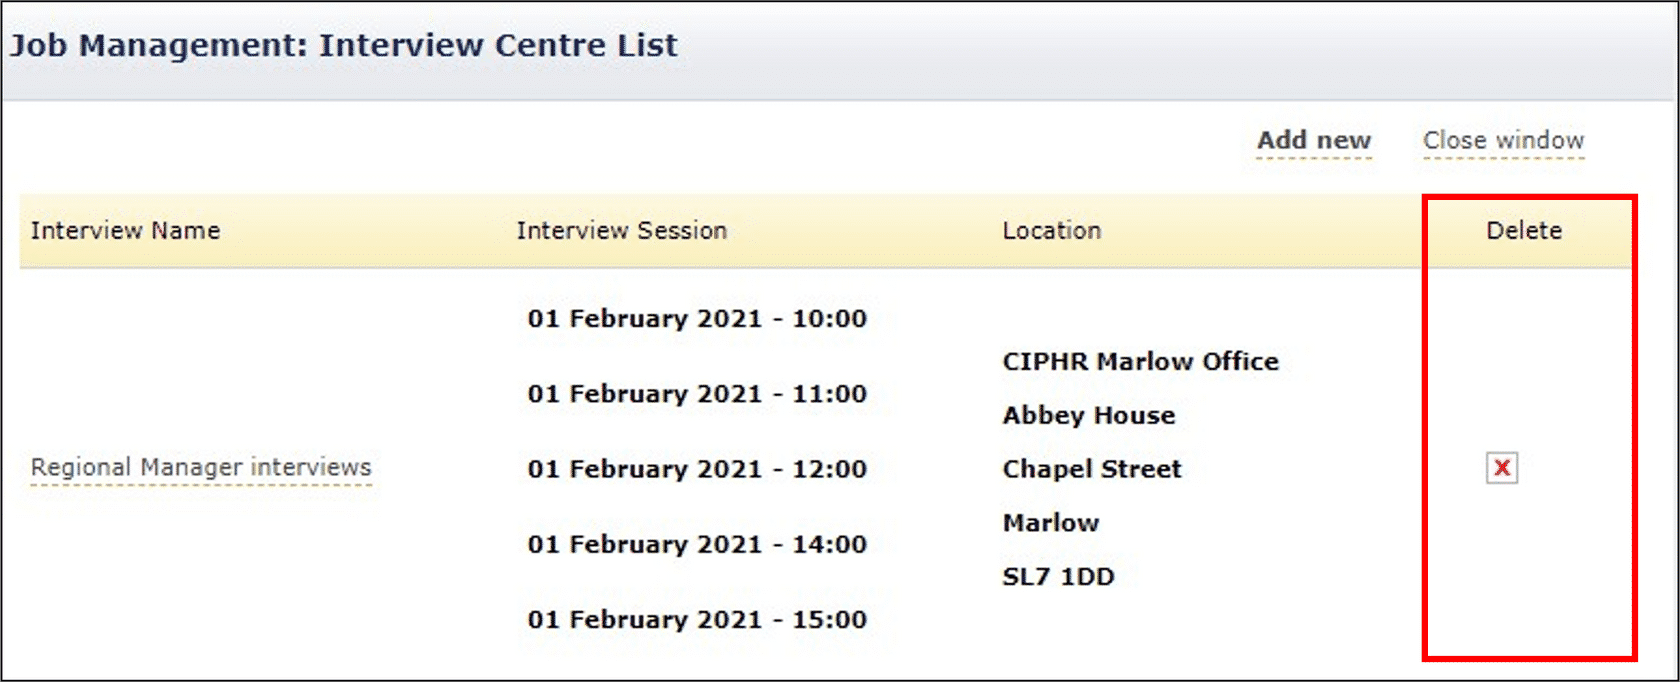
- From the Job Options menu click Interview Centres, a pop up box will appear displaying the centres already created
- Click on the red cross alongside the Interview Centre to be deleted
- A prompt will be presented to confirm deletion
Footer
Comments
0 comments
Article is closed for comments.