
This guide will provide an overview of the Manage Organisation area and show you how to add, delete, edit and move an index level.
Contents
- Manage Organisation overview
- Add an index level
- Delete an index level
- Edit an index level
- Move an index level
Manage Organisation overview
The Manage Organisation page is accessed through Admin > Manage Users > Manage Organisation.
The site is configured with an organisational hierarchy of up to seven indexes (or levels). The term organisational hierarchy defines the structure within which users, learning activities, training plans and Learning Journeys are assigned.
An individual hierarchy element is known as an Index. A collection of indexes, which together form a hierarchy, is known as an Organisation Structure.
The seven index levels in the organisation structure are:
| 1 Highest | LMS Index 1 | Country |
| 2 | LMS Index 2 | Region |
| 3 | LMS Index 3 | Area |
| 4 | LMS Index 4 | Branch |
| 5 | LMS Index 5 | Department |
| 6 | LMS Index 6 | Job Role |
| 7 Lowest | LMS Index 7 | Training Group |
| Note: on system set-up, the site can be configured to use less than seven indexes and the names of each index can be changed. |
There are some important rules relating to the organisation structure:
- Any two users at one Branch will share the same Area, Region and Country
- To ensure all elements are unique, a Branch cannot appear in more than one Area
- Departments, Job Roles and Training Groups are made available to all Branches
Manage Organisation is used to add, edit, delete or move an element in the initial four indexes (Country, Region, Area and Branch). Manage Organisation Types is used to Add or Edit an element in the other three indexes (Department, Job Role and Training Group).
| Note: sites which have a data feed will update user records and elements of the organisational hierarchy automatically through the data feed then you will not have access to Manage Organisation or Manage Organisation Types. |
Add an index level
1. Select Admin > Manage Users > Manage Organisation
2. Tick the Toggle Expanded View checkbox to show the full index structure.
3. Select the location to add the Area, Region or Country to. In this example we are adding a new Branch to the Cheshire Area. Selecting Cheshire shows the details for that Area in the right hand pane.
4. Select the Add [Element] button (in this example Add Branch).
5. Complete the details for the new Branch in the right hand pane. The Country and Region fields are already populated.
The Hide in Registration checkbox is only relevant for sites that allow user self-registration. In this case, selecting this checkbox means the user cannot select their full index levels.
6. Select the Type from the options in the Type field.
For more information on Manage Organisation Type see the Manage Organisation Types Help Guide.
7. Select the Save button to save the changes, or select the Cancel button to cancel the changes. The new Branch now appears in the main list and is part of the organisation hierarchy for the site.
Delete an index level
1. Select Admin > Manage Users > Manage Organisation
2. Tick the Toggle Expanded View checkbox to show the full index structure.
3. Select the location (Area, Region or Country) to be deleted. In this example we are deleting Branch N2683 in the Cheshire Area. Selecting Branch N2683 shows the details for that Branch in the right hand pane.
4. Select the Delete [Element] button (in this example Delete Branch).
|
Note: A confirmation box will appear when you select Delete Branch:
|
Options are then provided to:
- Cancel the action
-
OK - if any users are assigned to a Branch (or Area, Region or Country) then a warning message appears. Clicking Affected Users downloads a spreadsheet containing this information and you can then Confirm or Cancel. Unless you are sure you want to mark the users as Leavers, you should consider moving the affected users to a different location in the organisation structure before deleting an index level element.
5. Select the Confirm button to save the changes. The relevant element is removed from the structure.
Edit an index level
1. Select Admin > Manage Users > Manage Organisation
2. Tick the Toggle Expanded View checkbox to show the full index structure.
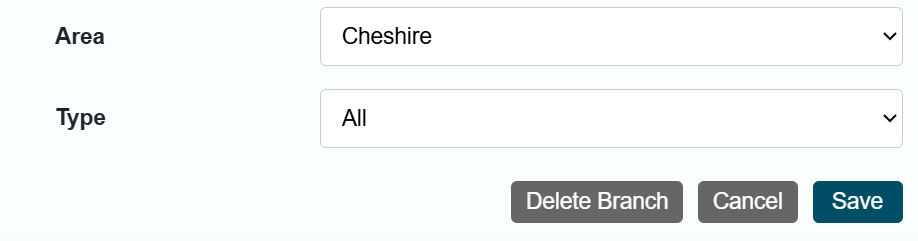
3. Select the location (Area, Region or Country) to be edited. In this example we are editing Branch N2659 in the Cheshire Area. Selecting Branch N2659 shows the details for that Branch in the right hand pane.
4. Edit the relevant field(s) for the location. In this example, we are changing the Branch name to N2660.
5. Select the Save button to save the changes.
Move an index level
1. Select Admin > Manage Users > Manage Organisation
2. Tick the Toggle Expanded View checkbox to show the full index structure.
3. Select the location (Area, Region or Country) to be moved. In this example we are moving Wiltshire Area from South Region to North Region. Selecting Wiltshire Region shows the details for that Region in the right hand pane.
4. From the drop-down options, select the Region to move the Area to.
5. Select the Save button to save the changes.
A warning message will display detailing the change about to be made; advising it may take some time and requesting confirmation.
6. Select the Continue button to confirm the change.
The Wiltshire Area and all associated Branch(es) have now been moved.
Footer
Comments
0 comments
Article is closed for comments.